
What you will find here
Learn how to create a project schedule in Project Online, with a walkthrough of task planning and schedule setup.
Have you ever had to organize all the tasks of a project, but was lost between dates, dependencies and tight deadlines? Creating a timeline in Microsoft Project Online is the solution for those who want to have full visibility of the project, time control and cloud security.
In this article, you will learn step by step how to create a schedule on Project Online and ensure that your projects proceed without surprise.
01Why create schedules in Project Online?
The Microsoft Project Online is an ideal tool for companies that want to manage projects professionally, with security, collaboration and governance. With him, you can do it:
- Create clear schedules with dates, durations and dependencies between tasks;
- View and update project progress in real time;
- Integrate with other Microsoft 365 tools, like the Planner, to organise operational tasks;
- Protect your data with all the security of Microsoft 365 and SharePoint Online.
Imagine that your company needs to deliver a project in three months, with several teams involved. With Project Online, you can ride one detailed schedule, define responsible, create important milestones and follow if everything is going as planned.
02Step by step to create a schedule in Project Online
Creating a schedule in Project Online is simple and ensures more control over deadlines and deliveries. Here's how to do it:
1. Access Project Online
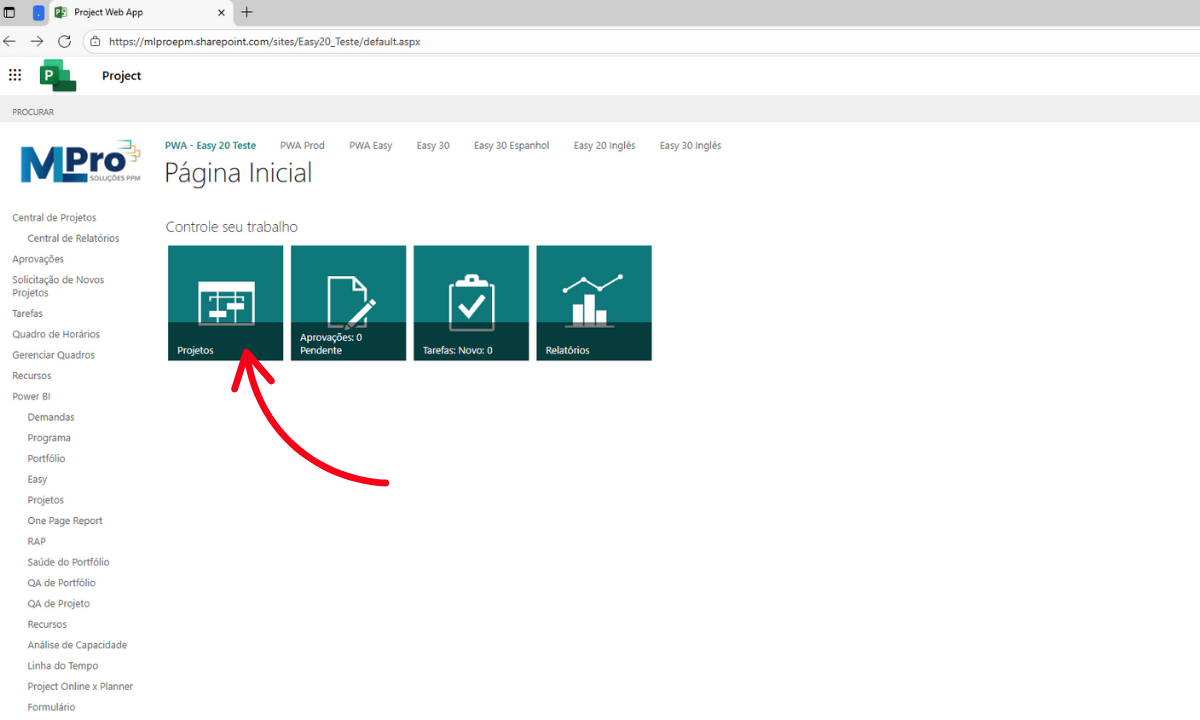
Get in. Project Web App (PWA) by its Microsoft 365;
Click Projects and choose create new project or open an existing project to add the schedule.
2. Enter your project tasks
In the task guide, enter the name of each activity, defining duration and dates;
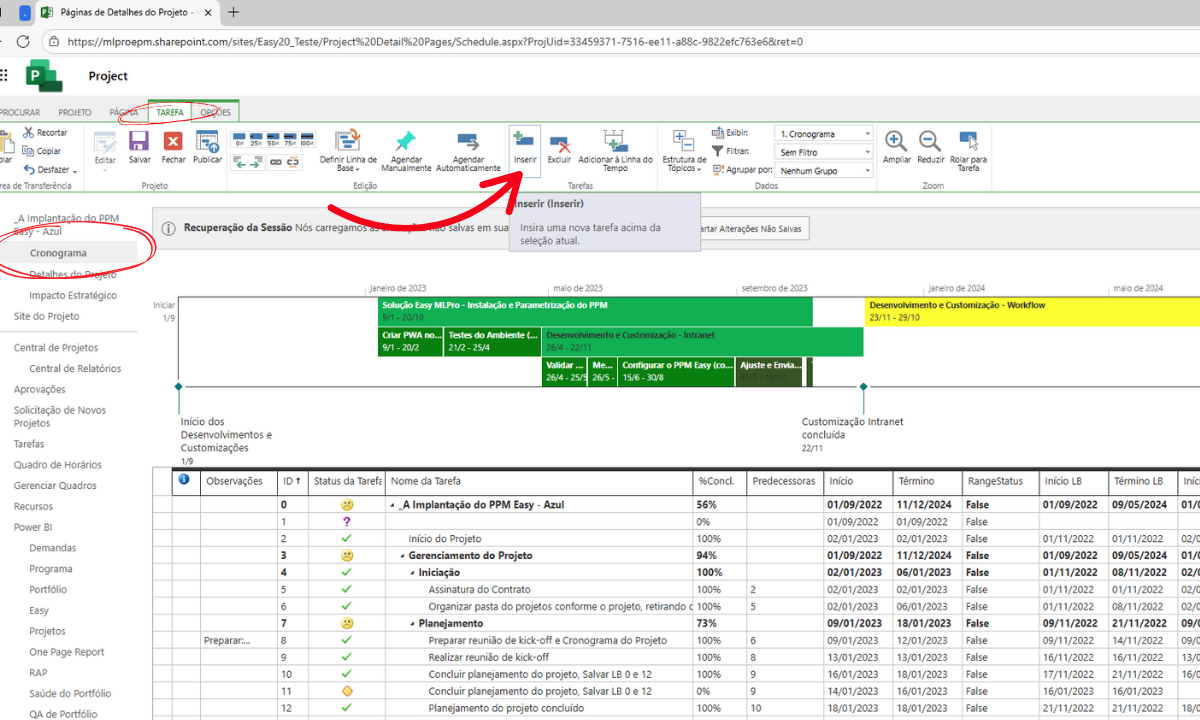
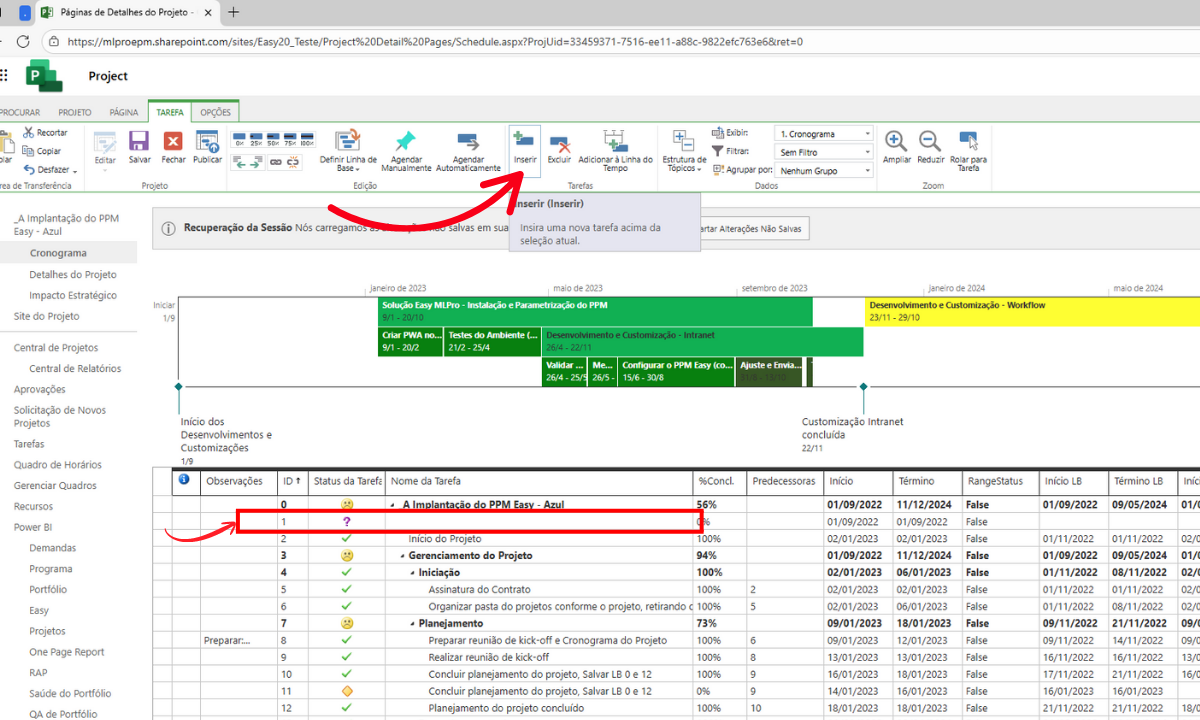
You can create subtasks to organize the phases of the project and make the schedule clearer;
You want an example? If you are planning a corporate event, the tasks can be to set location, hire suppliers, prepare materials and run the event.
3. Configure dependencies and milestones
Connect tasks that depend on each other to create a realistic timeline;
Add milestones to signal important steps, such as budget approval or start of execution.
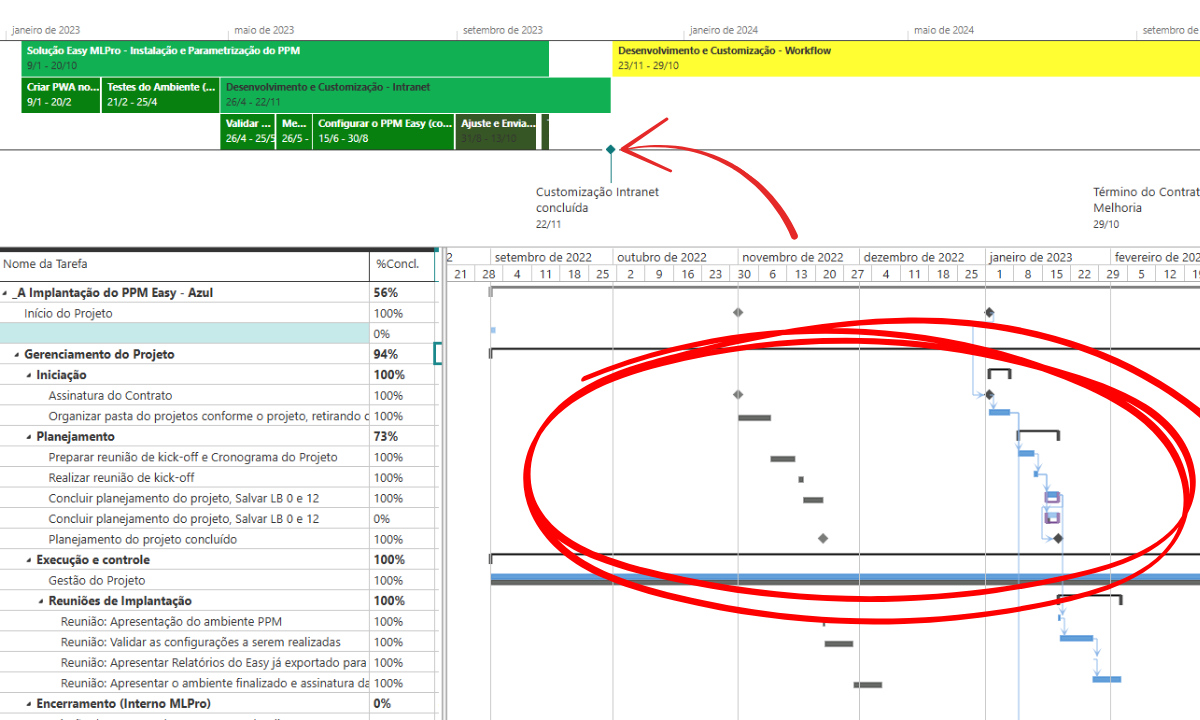
So, if a task is delayed, you immediately know what the impact will be on the rest of the schedule.
4. Adjust calendar and working hours
Project Online uses a default calendar, but you can set up specific team holidays and schedules;
That helps to have More accurate delivery dates, avoiding surprises in the middle of the project.
5. Publish and follow your schedule
After setting the schedule, publish the project for the team to view and update the progress;
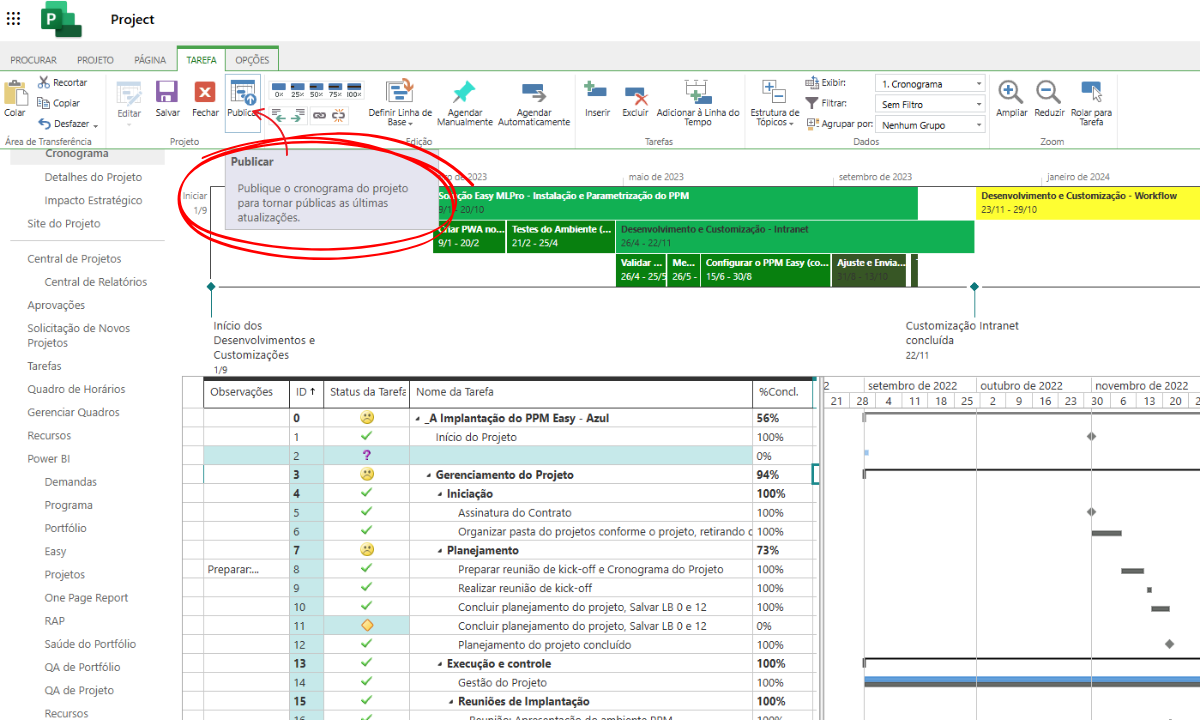
Use the resources of baseline and reports to compare the planned x performed;
So, you have total control over deadlines and can act quickly in case of deviations.
03Tips for an efficient schedule
- Use colors or categories to identify project phases visually;
- Update schedule frequently, to reflect the reality of the project;
- Review dependencies and milestones to avoid bottlenecks;
04How MLPro can help your company
Creating a schedule in Microsoft Project Online is only the first step towards having more organized, safe and efficient projects. A MLPro with over 20 years experience and more than 75,000 supported projects, helps companies to:
- Deploy and configure Project Online with security and personalisation;
- Training teams to create and manage schedules professionally;
- Integrate Project Online into the Microsoft 365 ecosystem, like Planner and Power BI, for full visibility of the projects.
If you want to transform project management in your company, contact MLPro and schedule a free presentation. We show in practice how to unite Efficient schedules, safety and productivity in a single environment. Schedule a free presentation: Click here And dial!
Original content from the MLPro editorial library, fully preserved and translated for the English website.